

21 Tool Storage Ideas to Organize Your Workshop and Garage Like a Pro in 2026
If your workshop looks like a hardware store exploded, you are not alone. Most tool chaos comes from having no real home for each tool, so things end up in piles, drawers, and random buckets. These tool storage ideas fix that problem for good. From simple pegboard walls to rolling cabinets and clever small-parts tricks, every idea below gives your tools a visible, reachable spot — so you spend less time hunting and more time building.
Wall Storage That Keeps Every Tool Visible
Wall storage is the fastest win in any workshop because it turns dead wall space into a working tool display. When tools hang where you can see them, you grab what you need in seconds and notice instantly when something is missing.
1. Classic Pegboard Wall
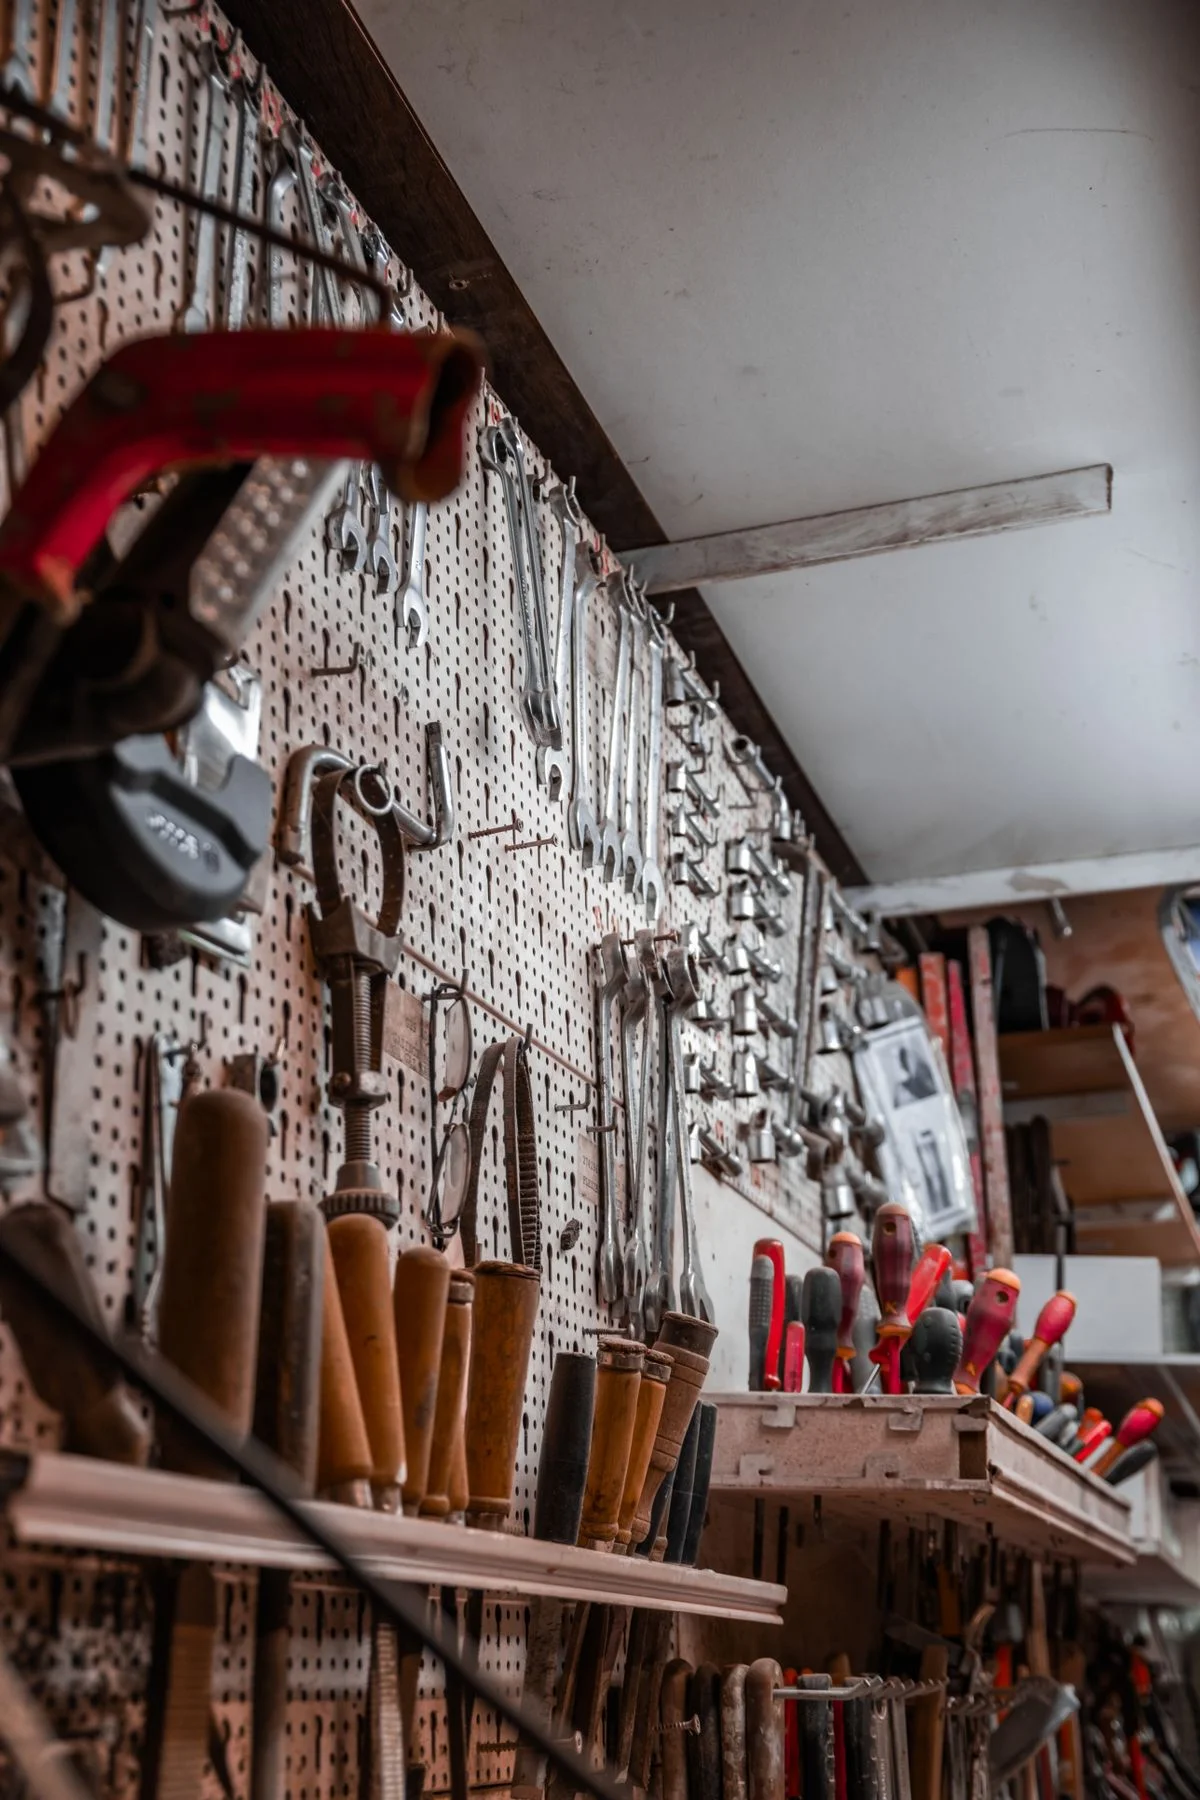
A pegboard wall is the classic tool storage solution for a reason: it is cheap, flexible, and endlessly rearrangeable. Hang a sheet of pegboard above your workbench, add assorted hooks, and arrange your most-used hand tools where your hands naturally reach. The real magic is that you can move hooks around as your collection changes, so the wall grows with you. Tip: outline each tool with a marker so every item has an exact home and a missing tool is obvious at a glance.
Start with a 4-by-8-foot sheet of quarter-inch hardboard or a metal panel, and mount it on 1-by-2 battens screwed into wall studs so hooks have room to seat behind the board. A full sheet costs less than a single mid-range cabinet, and a metal panel is worth the upgrade if you hang heavy saws or drills. Frame the edges with trim for a finished look that suits a garage you actually show guests.
Lay your tools on the floor first and group them by job, then hang daily tools at eye level and push seasonal gear to the edges. Leave about a fifth of the board empty, because a pegboard with no spare hooks fills up the week you buy a new tool. Check hook sizes before ordering: standard hooks suit most hand tools, but locking hooks stop heavy items sliding off when you bump the wall.
2. French Cleat Tool Wall

A French cleat system uses angled wooden strips on the wall and matching strips on holders, bins, and shelves, so everything locks in place but lifts off in seconds. It is stronger than pegboard for heavy items and looks beautifully tidy. Build holders for screwdrivers, pliers, saws, and even small shelves for glues and tapes. Tip: cut all your cleats from one long strip at 45 degrees, and keep a few spare blank holders ready for new tools.
Cut cleats from three-quarter-inch plywood, ripping a long board at 45 degrees to make two matching strips, one for the wall and one for each holder. Screw the wall strips into studs every 16 inches and they will carry shelves loaded with paint cans and power tools without sagging. A single sheet of plywood yields enough cleat stock for a whole garage wall, so the system stays cheap even at scale.
The common mistake is making holders too deep, so tools disappear behind a lip you cannot see over. Keep holders shallow and open-topped, and label the front of each bin with a paint pen. If a holder wobbles, add a second cleat strip at its base: one cleat holds, two cleats lock it dead still.
3. Magnetic Tool Strip

A magnetic strip is the simplest way to store metal hand tools like screwdrivers, wrenches, and pliers. Mount a heavy-duty magnetic bar above the bench, and tools snap on and off with one hand. It works brilliantly in tight spots where a full pegboard will not fit, such as the side of a cabinet or a narrow wall beside a door. Tip: choose a strip rated for the weight of your heaviest wrench, and keep it away from phones, cards, and precision measuring tools.
Buy a strip at least 18 inches long for a basic kit, or run two strips in parallel for a full wrench set, and mount it into studs rather than drywall anchors, since a loaded strip can weigh several kilos. Stainless or rubber-coated strips grip better and protect tool finishes from scratches. Keep the strip above bench height so tools never snag your sleeves while you work.
Do not store precision tools on a magnet: calipers, levels with magnetic vials, and digital measuring tools can pick up magnetism and read wrong. The same goes for anything with a compass or a memory card nearby. Wipe the strip monthly, because metal filings and dust collect along it and dull the grip over time.
4. Shadow Board Layout
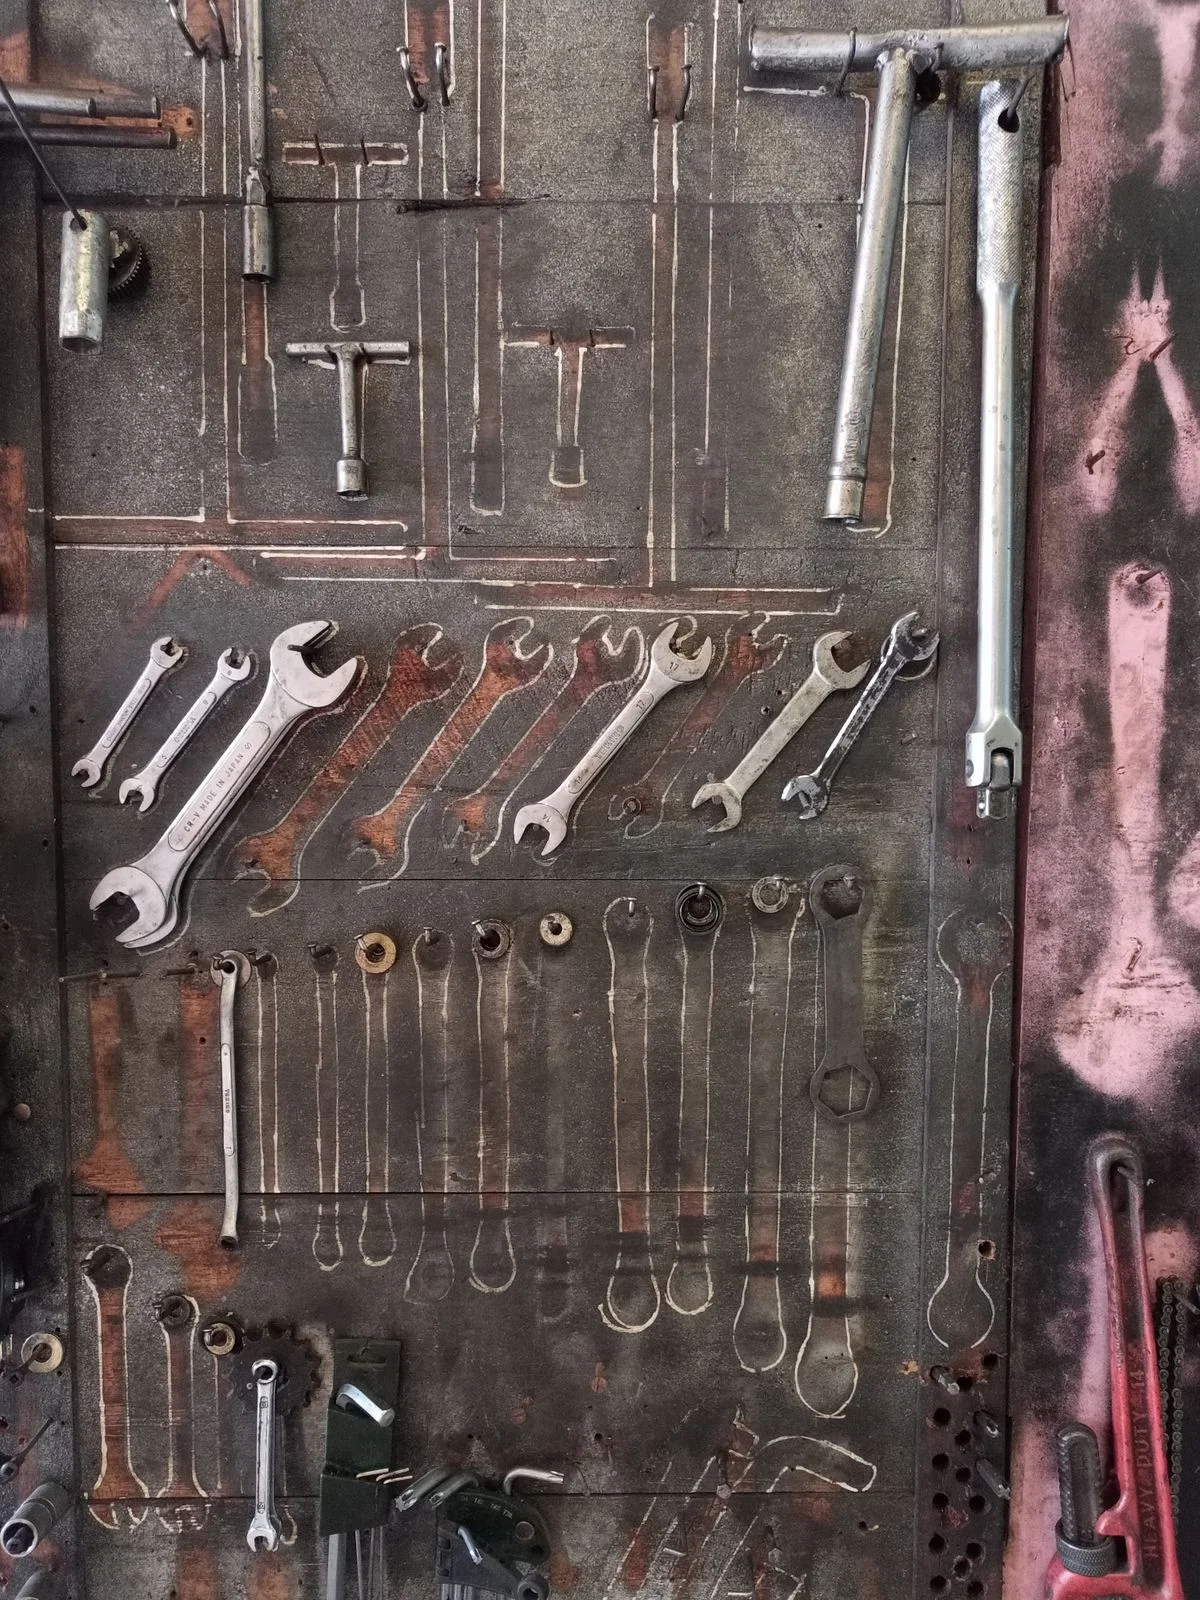
A shadow board takes pegboard one step further by painting or marking the outline of each tool on the board behind it. This turns your wall into a visual checklist: every tool has a silhouette, so cleanup takes seconds and gaps shout out loud. It is popular in professional shops for exactly that reason. Tip: trace tools with a paint pen on a contrasting board color, and photograph the finished layout so you can restore it after a big project.
Use half-inch plywood painted in a light color, then trace each tool with a dark paint pen or spray the silhouette through a stencil for crisp edges. Photograph the finished board before the first project, because that photo becomes your reset map when tools migrate. Shops that run shadow boards report faster end-of-day cleanup, since anyone can see exactly where each tool belongs.
The board only works if every tool has exactly one outline, so resist adding a second home for favorites. When you buy a new tool, trace it the same day, or it becomes the first item that lives on the bench instead of the wall. For shared workshops, a shadow board also settles arguments about missing tools in seconds.
5. Wall-Mounted Tool Rack

A fixed wall-mounted tool rack gives your most-used tools a permanent, sturdy home. Unlike pegboard hooks, which can pull out under weight, a screwed-in rack with slots or clips holds hammers, levels, and squares securely. Mount it at eye level near your bench so the tools you reach for daily are always within arm’s length. Tip: group tools by job — measuring tools together, cutting tools together — so you grab a set, not a single item.
Choose a rack with a steel spine and spring clips or slotted holders sized for your tools, and screw it into at least two studs so it cannot peel off under load. Racks made for a single tool type, like a level rack or a square rack, hold items more securely than universal racks. Mount the rack at chest height so you can return tools without stretching or bending.
Group racks by workflow rather than by tool size: a measuring rack near the saw, a fastening rack near the bench. That way you grab a cluster of tools in one motion instead of walking the wall. Leave one empty slot on each rack for the tool you will buy next month.
6. Long-Handled Tool Wall Hooks

Long-handled tools like shovels, rakes, and pry bars are the hardest to store because they topple out of corners. Heavy-duty wall hooks or a slotted rail solve this by holding each handle upright against the wall, heads up or down. This keeps walkways clear and stops handles from warping under a pile. Tip: space hooks at least a handle-width apart and add a small bungee loop for top-heavy tools that tend to swing.
Use heavy-duty J-hooks or a slotted rail rated for at least 10 kilos per hook, screwed into studs, since a full-size spade or pickaxe is heavier than it looks. Hang heads-up for shovels and rakes so blades stay off the floor, and heads-down for tools with sharp edges you want away from hands. A rail with sliding hooks lets you re-space as the collection changes.
The mistake most people make is cramming handles shoulder to shoulder, which tangles heads and makes grabbing one tool pull down three. Give each handle a hand-width of space, and add a small bungee or Velcro loop at the top for top-heavy tools like post-hole diggers that swing free. A strip of rubber on the rail stops handles sliding sideways.
7. Overhead Ceiling Tool Rack
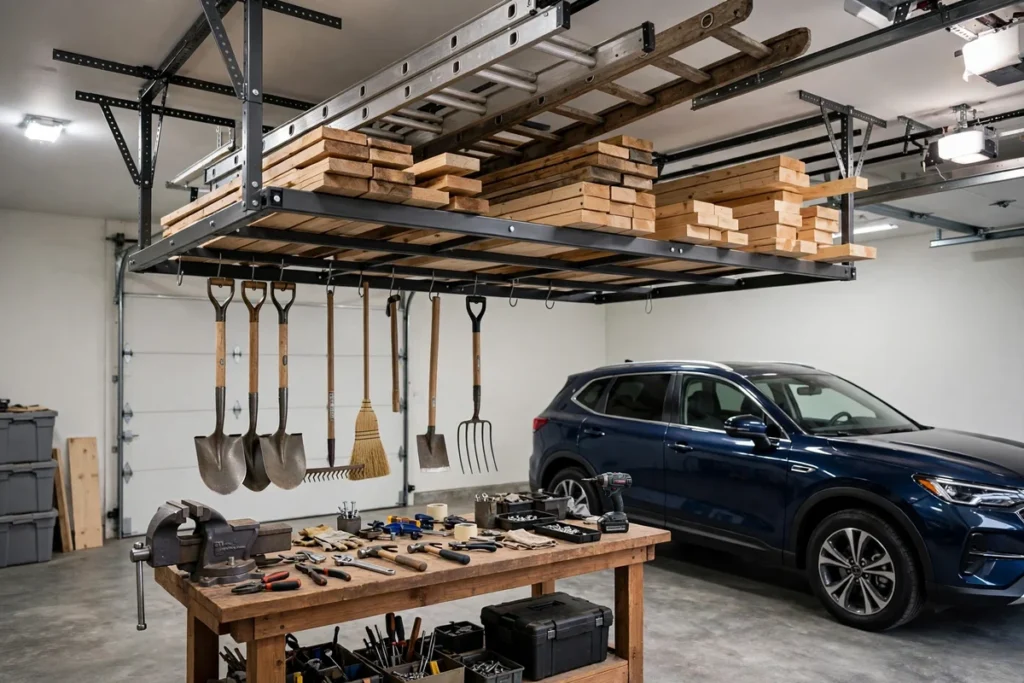
An overhead ceiling rack uses the empty space above your head for long, light, rarely used items like levels, clamps, and extension ladders. Mounted to ceiling joists, it frees wall and floor space for daily tools while keeping seasonal gear out of the way but still reachable. Tip: keep the rack within easy reach of a step stool, label the front edge, and never overload it beyond the joist rating.
Build the rack from steel angle or 2-by-4 framing bolted through ceiling joists, never just into drywall, and size it to the joist span of your garage. A 2-by-4-foot platform holds levels, clamps, and a folded ladder easily, while a longer run suits lumber and pipes. Keep the platform depth under 24 inches so items stay reachable from a step stool.
Only store light, rarely used items overhead, and never anything you need weekly, or the rack becomes a chore instead of a convenience. Label the front edge with painter’s tape so you know what lives up there without climbing. Check the bolts twice a year, since vibration from garage doors slowly loosens hardware.
Cabinets, Carts, and Workbenches With Storage Built In
When tools need protection from dust, kids, or curious hands, closed storage wins. Cabinets and carts also let you move your workshop to the project instead of carrying tools back and forth.
8. Rolling Tool Cabinet

A rolling tool cabinet is the workhorse of serious workshops: deep drawers on smooth casters that roll to wherever you are working. Big bottom drawers swallow power tools, while shallow top drawers keep sockets and bits sorted. Locking casters keep it parked, and a locking lid keeps everything secure. Tip: put your heaviest tools in the lowest drawers for stability, and add drawer liners so tools do not slide when the cabinet moves.
Look for ball-bearing drawer slides rated for at least 45 kilos, thick-gauge steel, and casters with locks on all four corners, not just two. A 52-inch cabinet with nine drawers suits a serious workshop, while a 26-inch unit fits a single-car garage. Measure your doorways before buying, because a loaded cabinet that cannot roll out of the room is just an expensive statue.
Organize drawers by job, not by tool type, and keep a printed drawer map taped inside the lid for anyone else who uses the shop. Foam liners stop tools rolling when the cabinet moves, and a thin bead of silicone under the liner stops it sliding. Empty the top drawer weekly, since it collects the odds and ends of every project.
9. Tool Chest With Drawers
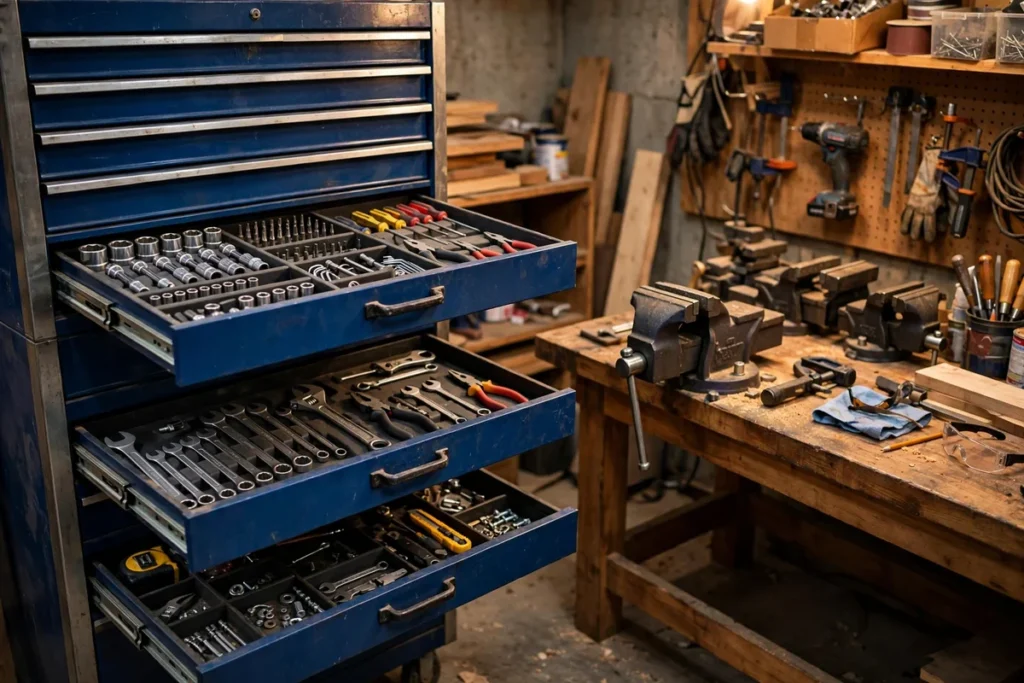
A classic tool chest combines a top box with a stack of drawers, giving every category of tool its own compartment. The top section is perfect for the tools you grab constantly, while deeper drawers hold specialty items. Label each drawer front so you never open four drawers to find one wrench. Tip: sort drawers by task — fastening, measuring, cutting, electrical — rather than by tool type, and you will work faster.
A chest with a top box and a rolling base gives you two layers: the top box for daily tools and the base for bulk storage. Look for gas struts on the lid, drawer liners included, and a keyed lock if kids visit the shop. Older steel chests often outlast new ones, so a secondhand chest with smooth slides can be a bargain.
Label drawers with a label maker, not masking tape, since tape peels in heat and leaves residue. Keep the chest against a wall with enough clearance to open the lid fully, and park it where you stand most, not in a corner you never visit. A chest that stays put also deserves a small parts tray on top for the screws and bits of the current job, so they never end up loose in a drawer.
10. Portable Toolbox Organizer
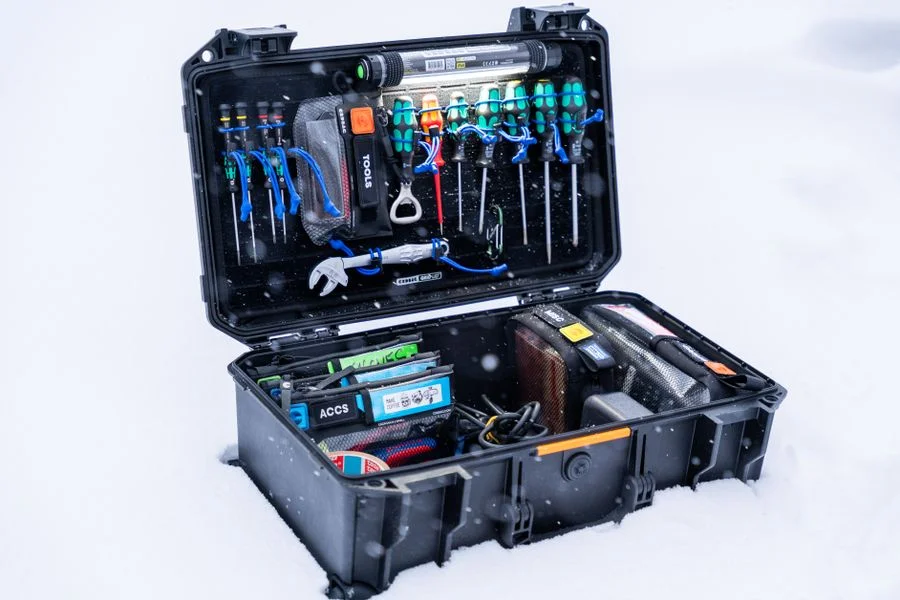
A portable toolbox organizer is for the tools that leave the workshop with you. A sturdy box with a lift-out tray and small compartments keeps your go-to kit together for repairs around the house or at a friend’s place. The best setups hold a core kit: hammer, screwdrivers, pliers, tape measure, and a few fasteners. Tip: restock the box the moment you return home, so it is always grab-and-go ready for the next job.
A 20-inch steel or hard plastic box with a lift-out tray carries the core kit for most household repairs, while a soft-sided tool bag suits tight spaces and car trunks. Pick a box with a comfortable handle and metal latches, because plastic latches are the first thing to break on a loaded box. Keep a small parts box inside for screws and wall plugs.
The habit that makes a portable kit work is restocking it the moment you get home, not the morning of the next job. Check the kit monthly and replace worn bits and dead batteries. A kit that is always ready turns a 20-minute repair into a five-minute one. Keep the box in the same spot every time, ideally near the door or in the car trunk, so grabbing it becomes automatic and nobody has to hunt for it first.
11. Rolling Work Cart

A rolling work cart is a mobile mini-bench with shelves or drawers that follows you around the garage. Load it with the tools for today’s project, roll it to the car, the garden gate, or the far bench, and everything stays at hand. It beats making ten trips back to the main bench. Tip: dedicate the top surface to active work only, and clear it at the end of each session so the cart stays useful.
A three-shelf steel cart with a 100-kilo capacity handles most workshop jobs, and a locking caster set keeps it still while you work. Add a magnetic parts tray and a small power strip to the top shelf, and the cart becomes a mobile workstation for sanding, assembly, or repairs anywhere in the garage. Choose a cart narrow enough to pass through your doors.
Dedicate the cart to one project at a time and clear it when the project ends, or it quietly becomes another storage shelf. A clipboard or whiteboard on the side holds the cut list and keeps the top surface free for actual work. Label the cart’s parking spot on the floor with tape, so it always returns to the same bay and never blocks a walkway or the garage door.
12. Workbench With Built-In Storage
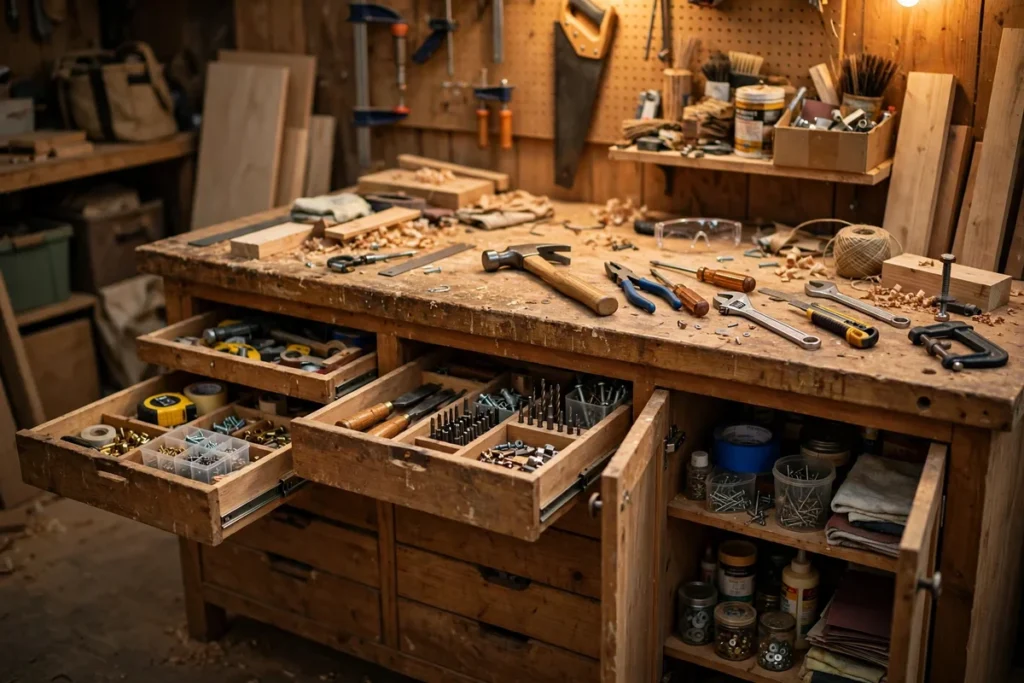
A workbench with built-in storage turns the biggest surface in your shop into a storage hub. Shelves, drawers, and a lower cabinet beneath the top hold power tools, paint cans, and bulky supplies right where you work. It keeps the bench surface clearer because supplies live inches below your hands. Tip: leave one open bay under the bench for a shop vacuum or a large toolbox, and keep the heaviest items low.
A bench with a hardwood or thick plywood top, a lower shelf, and two or three drawers covers most home workshops. Build or buy a bench at a height that matches your work: 36 inches for general tasks, lower for heavy assembly. A bench against the wall suits small shops, while a freestanding bench lets you work from all sides.
Keep the bench top clear by rule: tools go back to their wall or drawer home at the end of each session, not onto the bench. A bench that doubles as storage always loses its work surface first, so protect the top like the tool it is. Add a replaceable hardboard cover over the bench top if you do messy work, since a scarred cover swaps out in minutes while a ruined bench top does not.
13. Under-Bench Drawer Unit
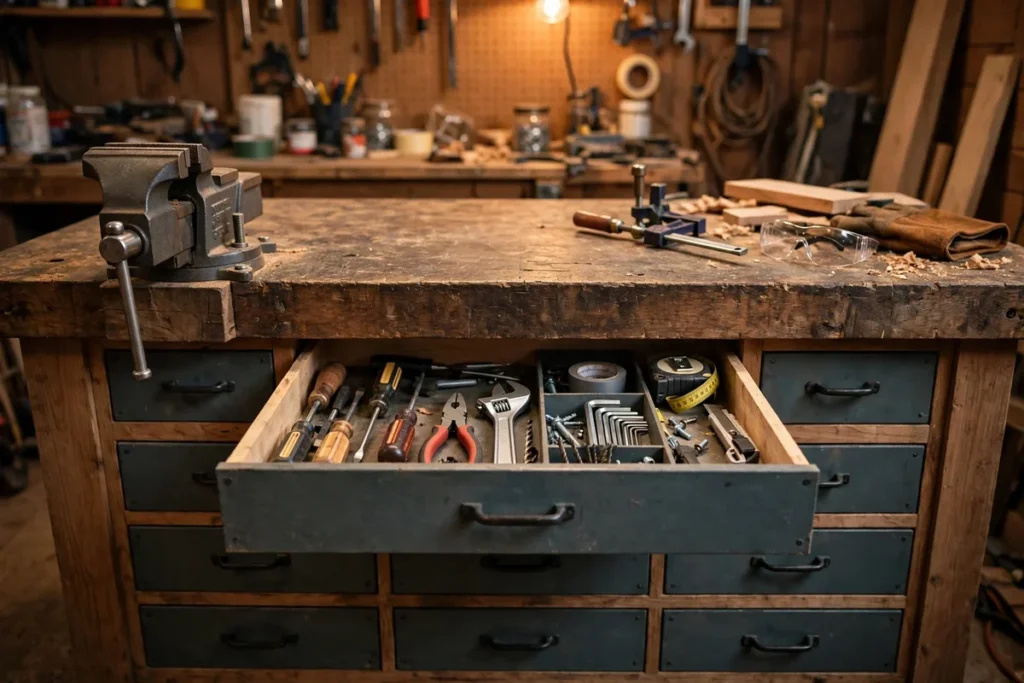
An under-bench drawer unit slides into the wasted space beneath your workbench and turns it into organized storage. Shallow drawers are ideal for sandpaper, blades, and bits, while deeper ones hold drills and sanders. Because the unit sits under the bench, it adds zero footprint to the room. Tip: mount the unit on small casters or a plinth so you can pull it out fully for cleaning behind it.
A drawer unit that fits the exact bay under your bench turns dead space into storage for sandpaper, blades, and small power tools. Measure the bay height and depth before buying, and leave a finger-width of clearance so drawers open without scraping the bench frame. A unit on casters pulls out for cleaning and for reaching items at the back.
Sort shallow drawers by consumable type: abrasives, blades, drill bits, and label each drawer front. Deep drawers suit drills and sanders, but keep their weight low so the unit stays stable when a drawer is fully extended. A strip of non-slip liner in each drawer stops contents sliding when the unit rolls, and a quick monthly wipe keeps sawdust out of the drawer slides.
Small Parts, Power Tools, and Specialty Storage
The smallest items cause the biggest mess. Screws, bits, batteries, and chargers scatter everywhere unless they get their own dedicated system.
14. Drawer Dividers and Foam Inserts
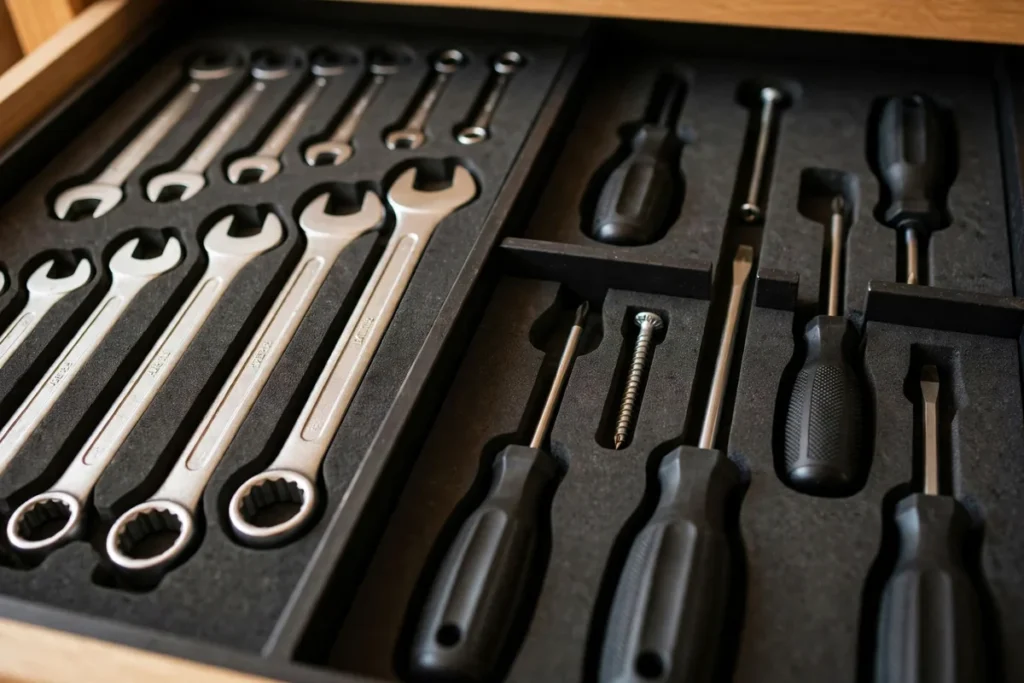
Drawer dividers and foam inserts stop drawers from becoming junk pits. Cut foam to fit each drawer, trace your tools onto it, and cut snug pockets so every item sits in its own slot. Dividers do the same job more cheaply for mixed drawers. The result is a drawer you can open and read at a glance. Tip: use two foam colors layered together — a bright base under a dark top — so an empty pocket stands out instantly.
Closed-cell foam cuts cleanly with a sharp knife and holds its shape for years, while cheaper open-cell foam crumbles. Trace each tool with a marker, cut slightly inside the line for a snug fit, and peel layers to the right depth. Dividers from thin plywood or plastic suit mixed drawers where foam would waste space.
Do not foam-line every drawer: reserve foam for precision and expensive tools, and use dividers for the rest. A drawer that is fully foamed looks impressive but wastes space when your tool set changes, so leave one divider drawer flexible for new additions. Trace new tools the day they arrive, because a drawer without a cut pocket quickly becomes the drawer where everything loose ends up.
15. Labeled Small-Parts Bins

Labeled small-parts bins are the answer to the coffee can full of mystery screws. A wall-mounted bin rail or a stackable bin cabinet sorts screws, nails, anchors, and bolts by size and type, with a clear label on every bin. You will stop buying duplicates of fasteners you already own. Tip: label bins with both the item and the size, and keep one empty “sort me” bin for hardware you remove during projects.
A wall-mounted bin rail with tilt-out bins suits a workshop wall, while a stackable cabinet suits a bench or shelf. Buy bins in one size family so they interchange, and choose bins with a clear front or a label slot. Sort by fastener type first, then by size, because that matches how you search during a project.
Count a bin as full at 80 percent, since overfilled bins spill when you tilt them out. Keep a small magnet in the bin for finding dropped screws, and run a yearly purge: empty every bin, toss rusted or mystery fasteners, and relabel anything that drifted. Keep one spare empty bin on the rail at all times, because a project always produces hardware that belongs nowhere yet, and a spare bin stops it landing on the bench.
16. Mason Jar Screw Organizer

A mason jar screw organizer screws jar lids to the underside of a shelf, so jars of screws, nails, and bolts hang below and twist off when you need them. It costs almost nothing, uses otherwise dead space, and lets you see contents instantly through the glass. Tip: mount the shelf at eye level over your bench, and sort jars by project type rather than by fastener alone for faster grabbing.
Use standard-mouth jars with metal lids, screwed into a board or directly under a shelf with short screws through the lid center. Half-pint jars suit screws and nails, pint jars suit bolts and wall plugs. Mount the shelf at eye level over the bench so you can read contents without a ladder.
Label lids as well as jars, because you look down at lids when jars hang below a shelf. Do not hang jars above a walkway where a dropped jar becomes a hazard, and keep one empty jar on the shelf for hardware removed during a project. Check jar lids yearly for rust, since a rusted lid can seize onto the shelf board and turn a quick grab into a wrestling match.
17. Power Tool Charging Station

A power tool charging station gathers chargers, batteries, and tools in one safe spot instead of spreading them across benches and floors. A shelf with a power strip, short cords, and a row of chargers keeps batteries topped up and ready, and keeps heat away from sawdust piles. Tip: label each charger with its tool brand, and set a rule that dead batteries go straight to the station after every job.
A wall shelf with a power strip, short cords, and a row of chargers keeps every battery in one place, away from sawdust and solvents. Use a strip with surge protection and individual switches, so you can cut power to idle chargers. Mount the shelf near an outlet but away from direct sunlight, which degrades batteries.
Label each charger with its brand and voltage, because look-alike chargers for different tools are easy to mix up. Store batteries at room temperature and never on a concrete floor, which drains them faster. A monthly check catches swollen or dead packs before they become a hazard. Keep a small fireproof bag or metal box nearby for damaged packs, and never charge a swollen battery: take it to a recycling point instead of risking a fire.
18. Drill Dock and Battery Shelf
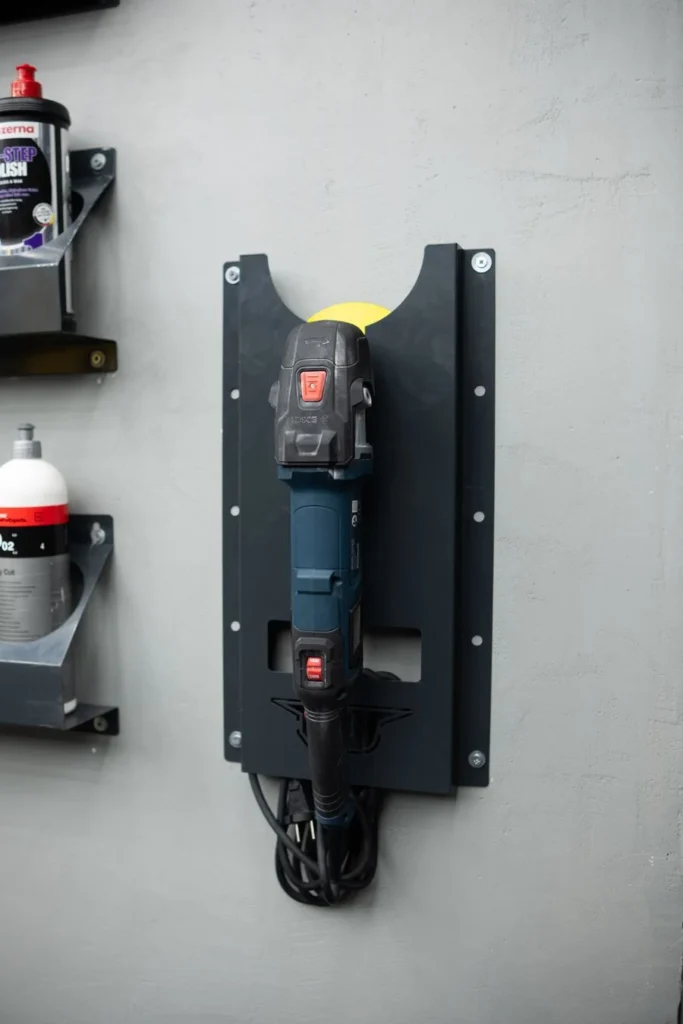
A drill dock is a wall-mounted shelf with slots that hold cordless drills upright, batteries below, and bits beside them. It ends the pile of drills on the bench and keeps your most-used power tools ready to grab with one hand. Many people build one from scrap plywood in under an hour. Tip: build the dock near your charging station but not above it, so drills never block charger vents.
Build a dock from half-inch plywood with slots cut to fit drill bodies, a shelf below for batteries, and a side bin for bits. A dock for three drills and four batteries fits on a 24-inch wall section, and scrap plywood keeps the cost near zero. Mount it at chest height so drills slide in and out with one hand.
Keep the dock away from the charging station’s heat and never directly above chargers, since blocked vents overheat chargers. Add a small parts bin for the bits you use with each drill, so the drill and its bits live together. Label each slot with the drill’s voltage or model, so anyone borrowing a drill returns it to the right slot instead of the nearest empty one.
19. Tool Roll for Wrenches

A tool roll wraps a full wrench or chisel set into a compact bundle that unrolls flat when you need it. It is perfect for mechanics and woodworkers who carry sets between the shop and the job, and it protects edges far better than a loose drawer. Canvas rolls are tough, washable, and cheap. Tip: label the outside of each roll with its contents, and roll from the small end so the bundle stays tight.
Canvas rolls with individual pockets suit wrenches, chisels, and carving tools, while leather rolls suit fine hand tools you want to protect. Choose a roll with a tie or buckle closure and pockets sized to your largest tool, and keep a roll per set rather than mixing sets. A roll unrolls flat on the bench, so you see every tool at once.
Wash canvas rolls occasionally, since sawdust and oil build up in pockets. Dry tools before rolling them up, or moisture trapped in the roll rusts edges. Label the outside with the set name, so you grab the right roll without unrolling three. Store rolls flat or hanging, never crammed into a drawer, since a crushed roll creases pockets and makes tools harder to slide in and out.
20. Rotating Benchtop Tool Carousel

A rotating benchtop tool carousel puts screwdrivers, pliers, and marking tools in a spinning caddy on your bench, so a quick spin brings the right tool to your hand. It is ideal for small benches where wall space is taken, and it keeps daily tools upright and visible instead of buried in a drawer. Tip: keep only your top ten bench tools in the carousel; overflow goes back to the wall, or the carousel becomes clutter.
A carousel with a weighted base and divided slots suits screwdrivers, pliers, markers, and scissors, and a lazy-Susan bearing keeps the spin smooth under load. Choose one with a diameter under 12 inches for a small bench, and keep it near your dominant hand. Metal carousels last longer than plastic ones under daily use.
Limit the carousel to ten tools, because an overloaded carousel spins slowly and hides tools behind each other. Rotate it weekly to check for tools that migrated in from elsewhere, and move anything you have not touched in a month back to wall storage. Wipe the carousel base weekly, because dust and metal shavings collect under it and eventually grind the bearing until the spin feels rough.
21. Tool Apron and Belt Station

A tool apron and belt station gives your wearable storage a home. Hang your work apron and tool belt on sturdy hooks by the bench door, with pockets emptied after each project, so you can suit up in seconds for the next job. It also stops belts from living on the floor or draped over a chair. Tip: keep a small pocket dump tray beside the hooks for the screws and bits that always end up in apron pockets.
Hang the apron and belt on heavy hooks or a short rail near the bench door, with a small shelf above for gloves and safety glasses. A canvas apron with divided pockets suits woodworking, while a leather belt with pouches suits framing and general repairs. Empty pockets after every project, or the belt gains weight and loses its shape.
Keep a dump tray beside the hooks for the screws, pencils, and bits that collect in pockets. Wash the apron monthly, and inspect belt stitching twice a year, since a torn pouch drops tools at the worst moment. A second set of hooks for a spare apron means laundry day never leaves you working without one, and guests always have something to wear.
How to Choose the Right Tool Storage for Your Space
Start by listing the tools you use weekly versus the ones you touch twice a year, then give the weekly tools the best spots — eye level, near the bench, and visible. Measure your wall and bench space before buying anything, and pick one system per zone rather than mixing five half-finished ideas. Heavy tools belong low or on strong fixed racks, sharp tools need covered or high spots away from kids, and anything battery-powered should live near an outlet. Finally, label everything: a system only stays organized if anyone in the household can put a tool back without guessing.
Frequently Asked Questions
What is the best way to store tools in a small garage?
Use the walls first. A pegboard or French cleat wall above the bench, a ceiling rack for long items, and one rolling cabinet give you the most storage per square foot. Keep bulky seasonal gear overhead and daily tools at eye level, and avoid floor piles, which eat space fastest.
Should tools be stored in drawers or on the wall?
Both have a place. Walls suit daily hand tools you want visible and quick to grab, while drawers suit specialty tools, sharp items, and anything you want protected from dust. A good rule is wall storage for your top twenty tools and drawer storage for the rest.
How do I keep my tool storage organized long-term?
Give every tool a labeled home, and make cleanup part of finishing a project rather than a separate chore. Shadow outlines, labeled bins, and drawer dividers make it obvious where things belong, so tidying takes minutes. Do a quick reset once a month to catch drift.
Is pegboard or French cleat better for tool storage?
Pegboard is cheaper and faster to set up, while French cleats hold heavier tools more securely and look tidier. If your tools are mostly light hand tools, pegboard is plenty. If you hang power tools, shelves, or heavy gear, French cleats are the stronger choice.
An organized workshop is not about buying more storage — it is about giving every tool one obvious home and keeping it there. Pick two or three ideas from this list, start with the wall above your bench, and you will feel the difference on your very next project. Pin this post to your workshop board so you can come back to it when you are ready to build your setup, and save your favorite idea to try this weekend.Photos: Pexels (free to use).


